Yarnspin
Designing the Yarnspin Engine
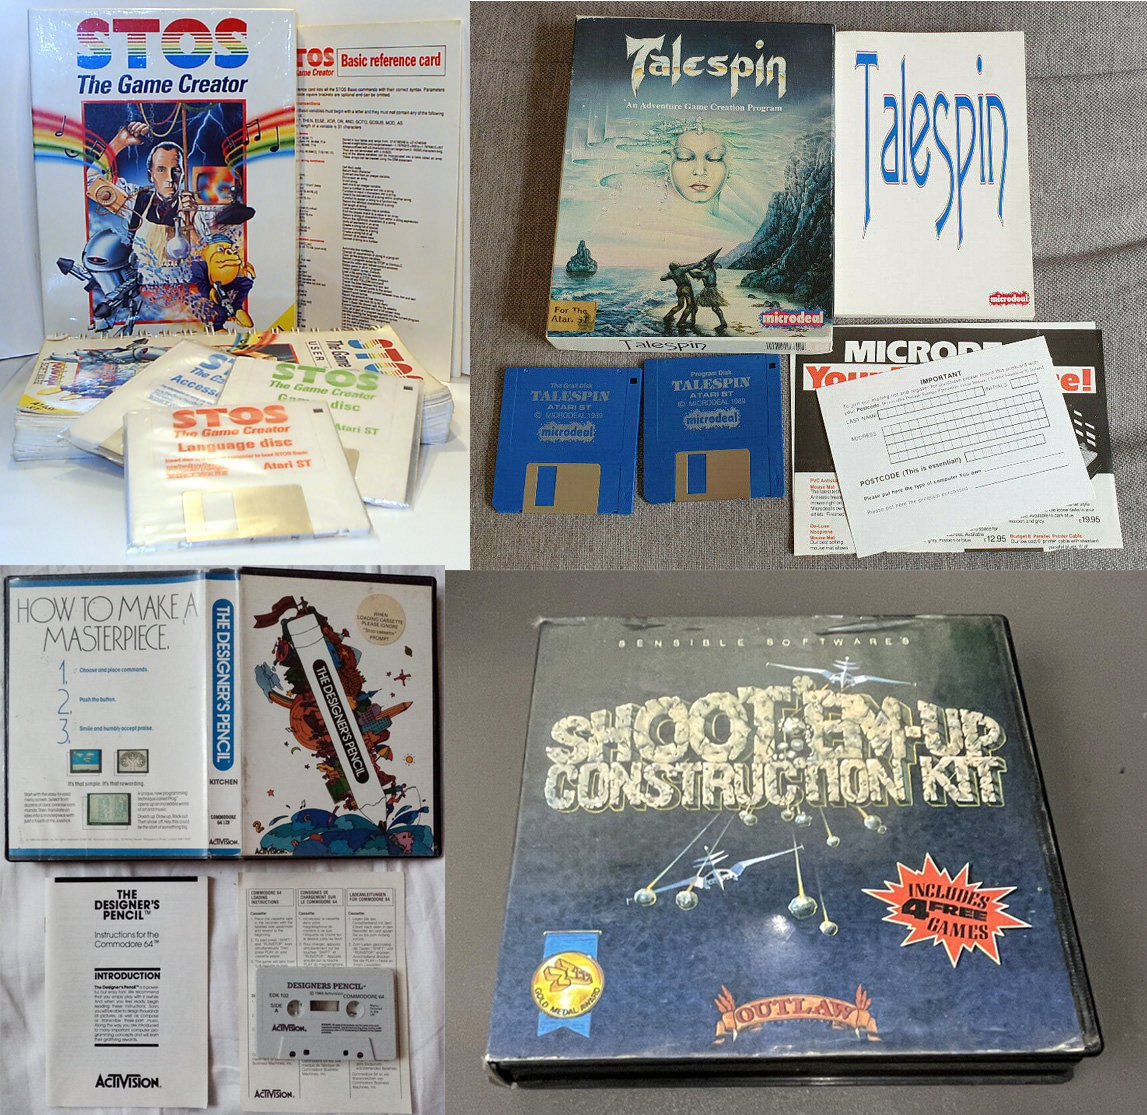
I have always been fond of game dev toolkits and construction sets. There is a beauty in the limitations they set, and something empowering about the simplicity they offer. I often enjoy figuring out how to make what I want to make within their given restrictions. When I first started using computers, first the Commodore 64 and later the Atari ST, I used a bunch of different gamedev tools.
Yarnspin as a concept, started out as the desire to make such a simple, oldschool engine. I imagined it as a choose-your-own-adventure game maker, and early on I intended to have features like money and skills, but later on I removed them to simplify things,
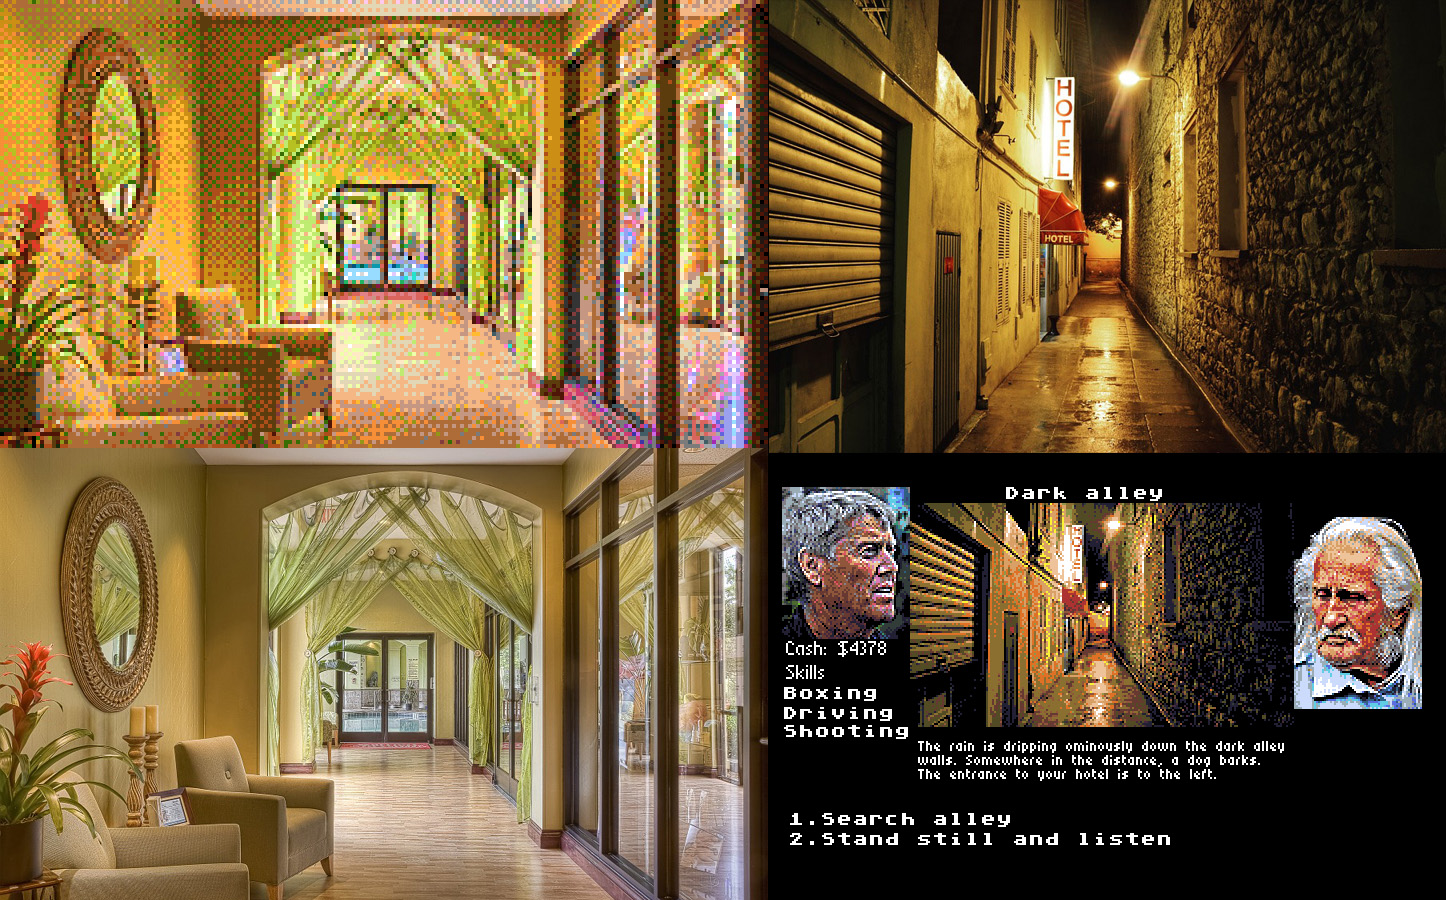
From the very start, I had the idea to make it in a retro style, but I also wanted to see if I could build in some tools to let you use any pictures and have them automatically fitted to a common, limited palette. I wanted it to be easy for anyone to make a game with it. When I first started out making games, I often stumbled on not being able to get something that looked decent. I wanted Yarnspin to try and bridge that gap.
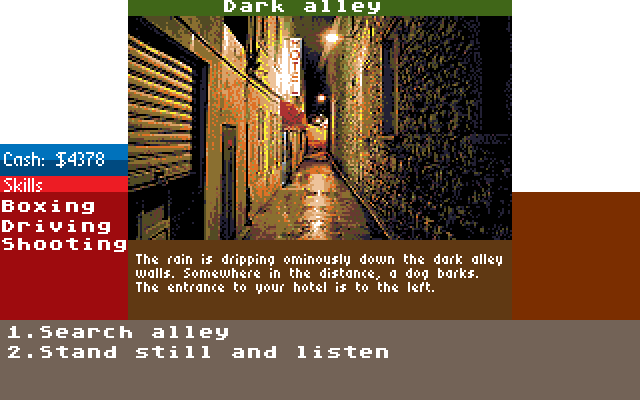
The UI/layout was in part inspired by the games Maupiti Island and Mortville Manor on the Atari ST.
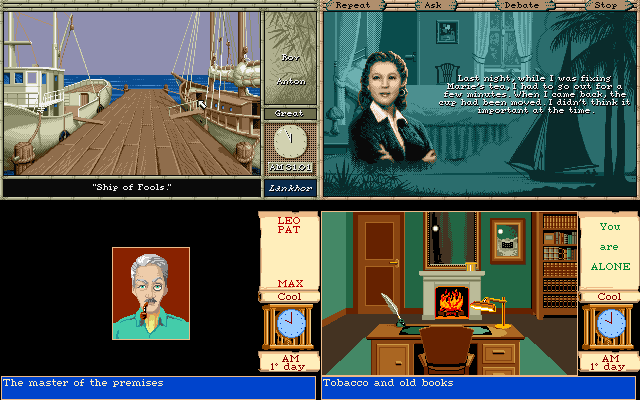
I decided to show the characters present in a side panel, just like in those games, and to have a corresponding items panel on the other side. At one point, I considered compass buttons for navigation, but dropped it. I might bring that idea back, to free up some options slots.

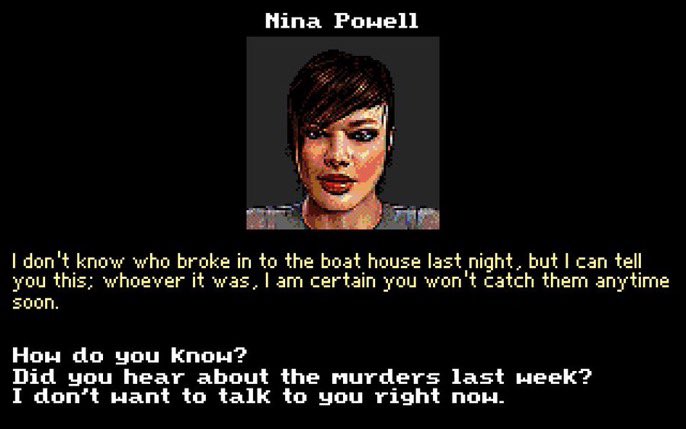
When it comes to dialogs, I decided to keep the layout simple and similar to the locations screen. As you can only talk to one character at a time, there is no character list, but there is the item list on the right (empty in this screenshot).
Just like with location pictures, I wanted to provide an easy way to get portrait pictures into the game. Since using a photo of someone requires their permission, I instead opted to include a lot (1000 to be precise) auto generated character portraits.
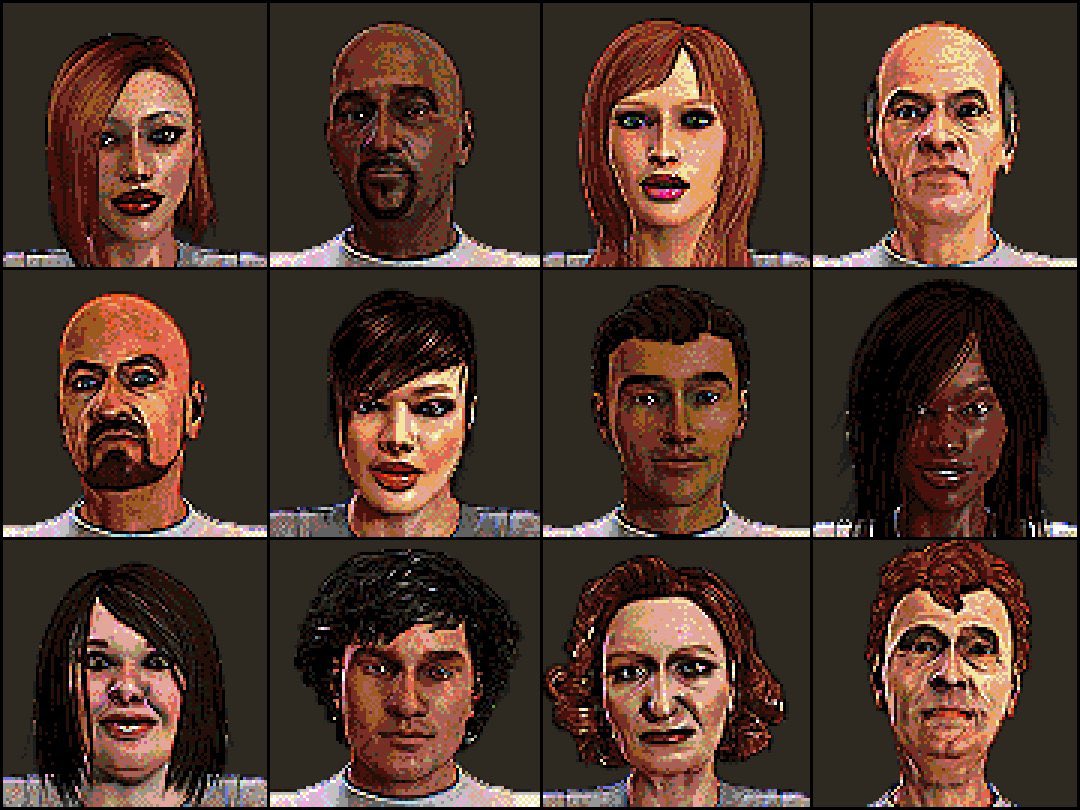
Of course, you don’t *have* to use these portraits, just like you don’t *have* to use photos for locations. But they are available as an option, for those who feel that it helps. The portraits were generated in Poser, by a script which randomize character features and pose.
By default, it is using this 64 color palette by androidarts
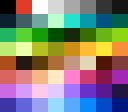
which I think works really well.

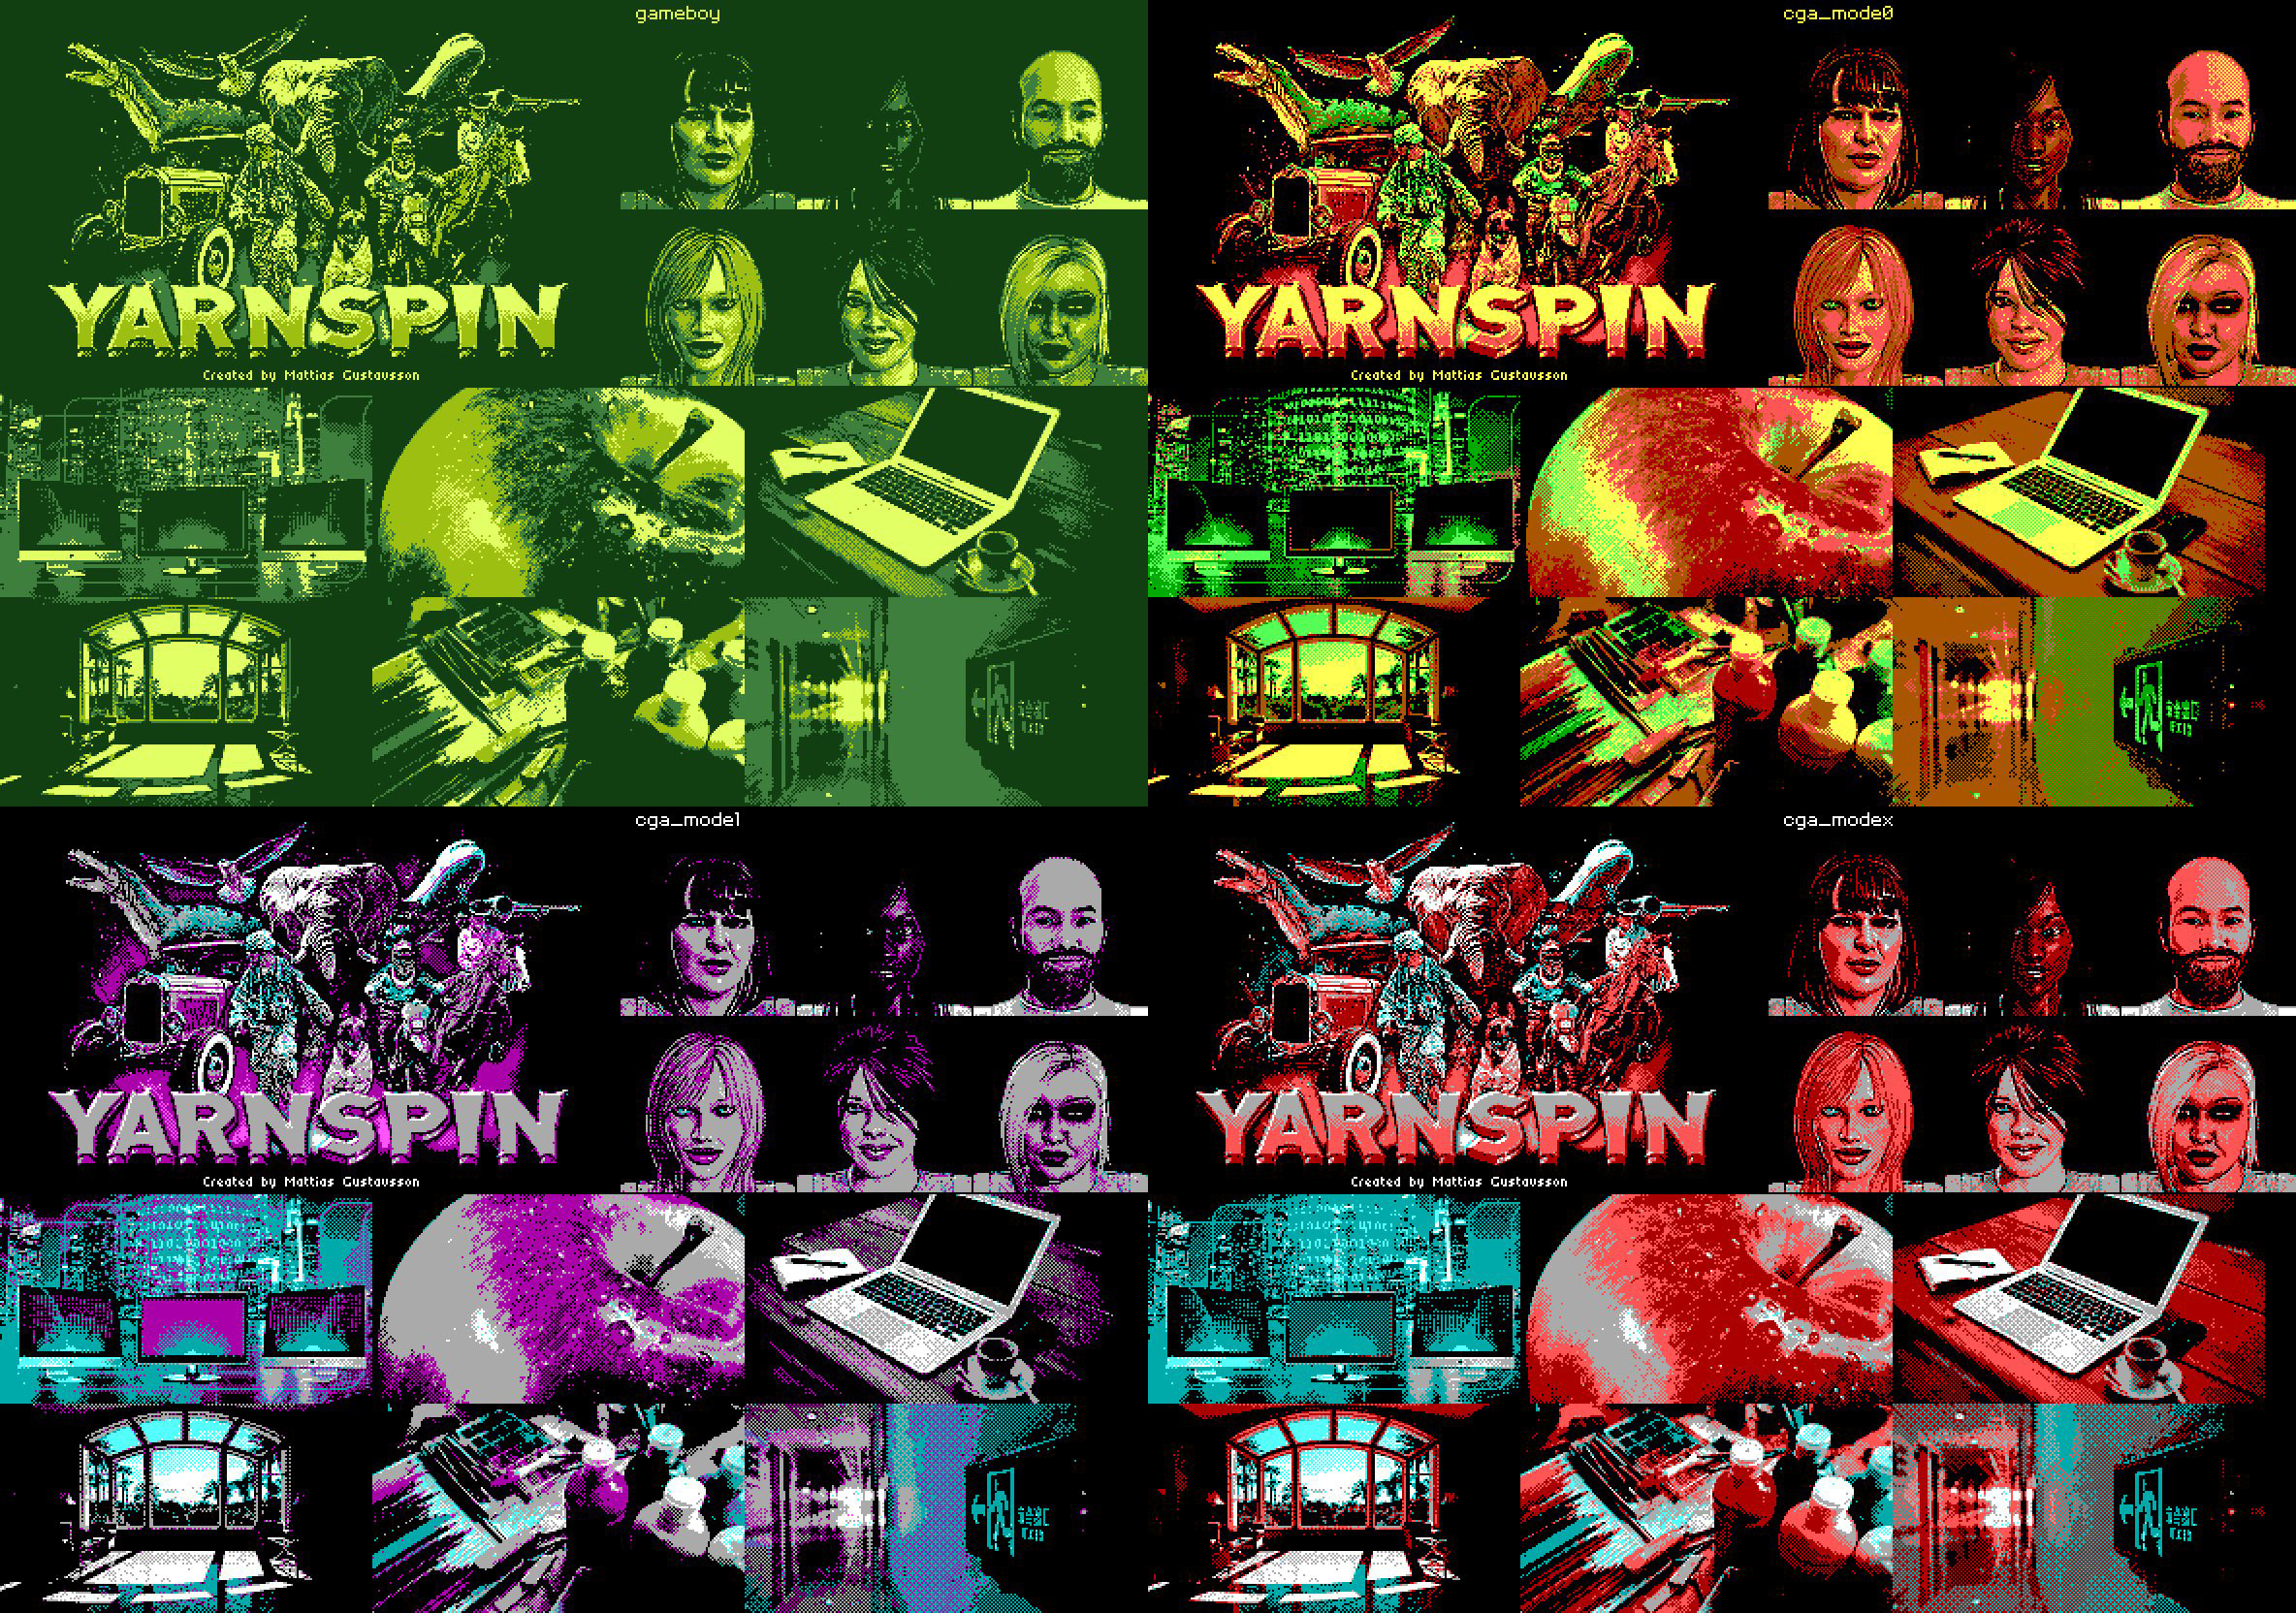
By changing the palette used, you can dramatically change the look. There’s a bunch of palettes included, and you can supply your own just by giving it an image file with the palette.
Here are some other palette examples. The one labeled rgb332 is a 256 color palette with an even distribution of colors, with 3 bits each for red/green and 2 bits for blue.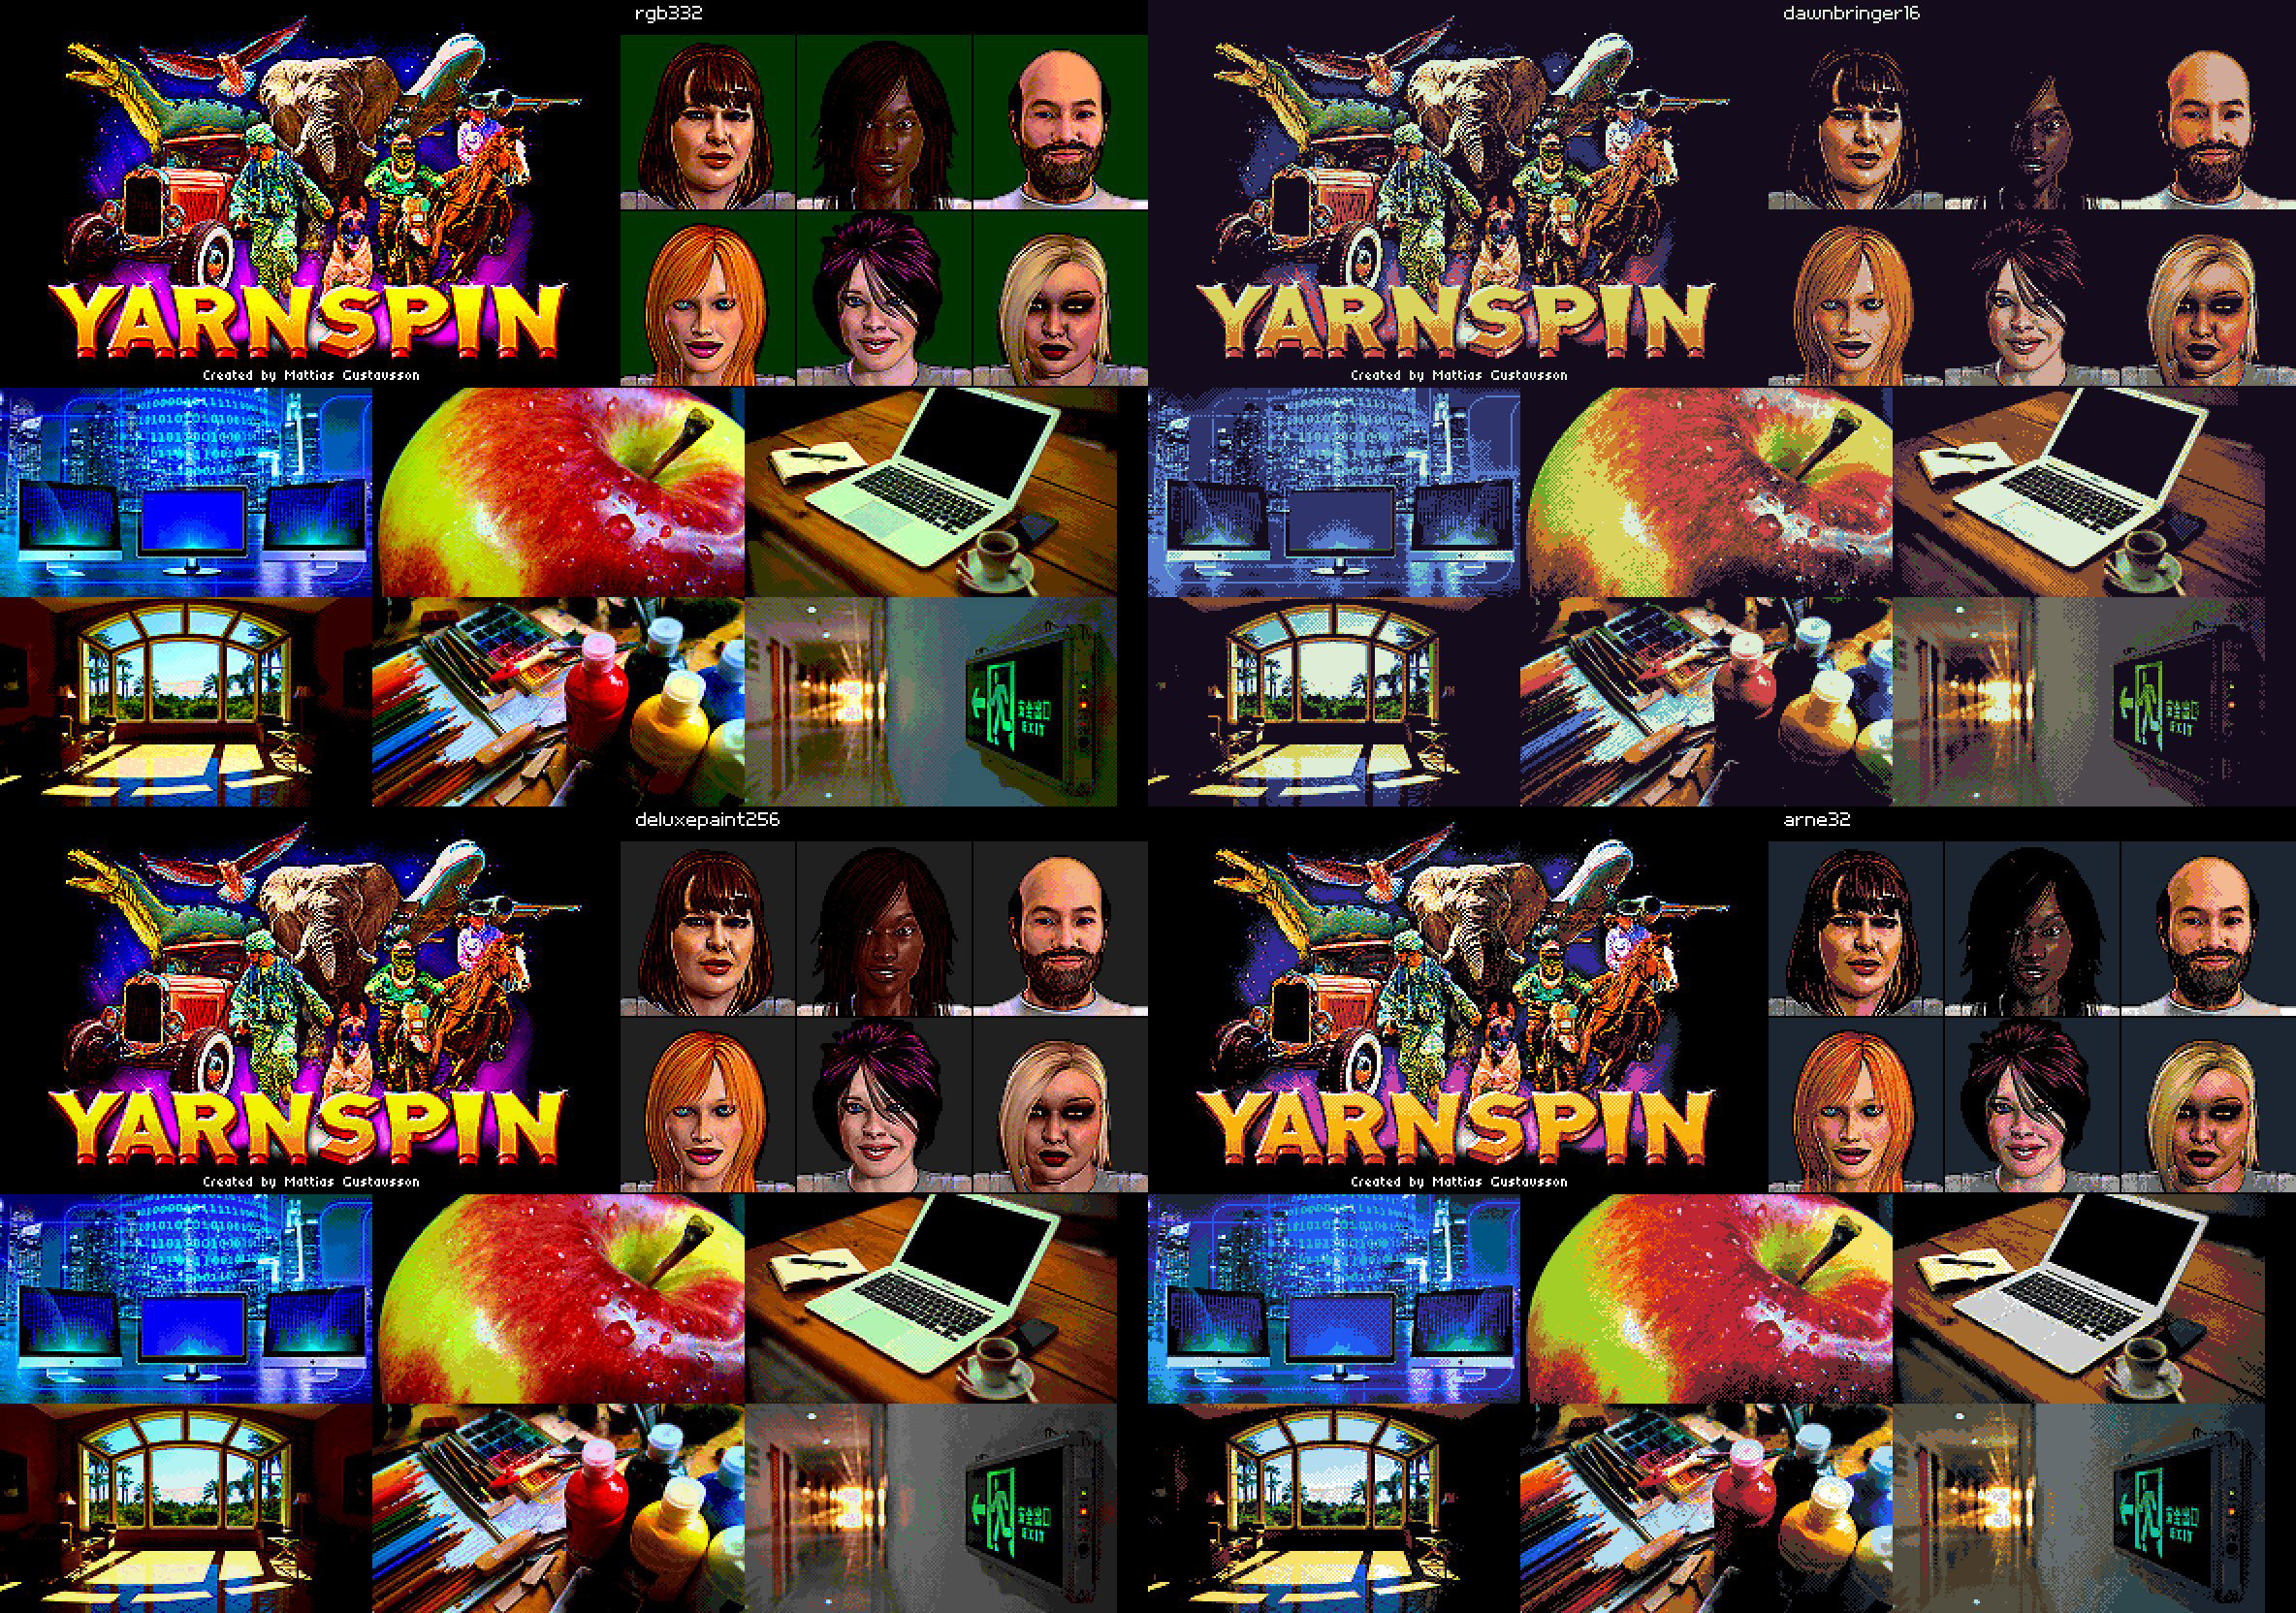
Using very limited palettes can give a highly stylized look. There is no emulation of graphics limitations beyond palette though. We are not trying to make things look like a specific old system here.
From the very start, I wanted games to be done by writing scripts, not by clicking a UI. Part of it was not having to build a visual tool, but also, I like working with text, I like the overview I feel I am getting with text files.
In fact, before even starting on the graphical parts, I had a very simple testbed for exploring the scripting language:
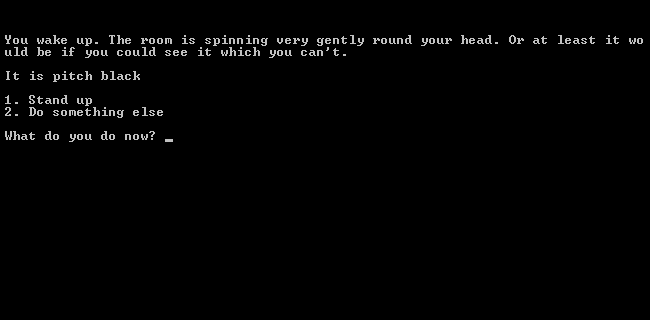
I wanted the scripts to be a lot more friendly than general purpose programming languages. You shouldn’t need to be an engineer to use this. My first version was in the form of ini files, which was very easy to implement, as I already had an ini loader. But it was awkward to use,
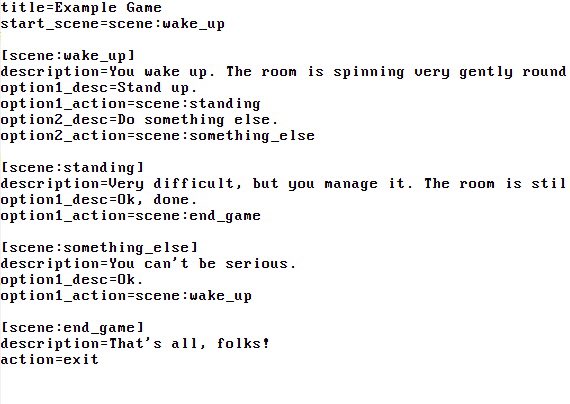
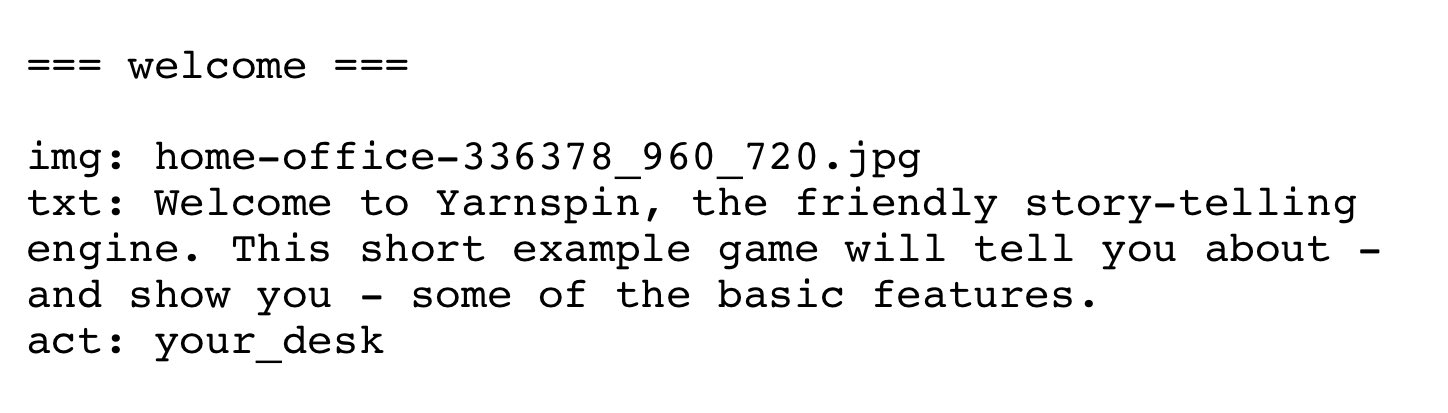
I soon moved to a custom parser, and that let me simplify many things. This is what the final scripting language looks like. This is a location named “welcome”, which shows an image and a text. When the user clicks to proceed, it goes to the new location “your_desk”
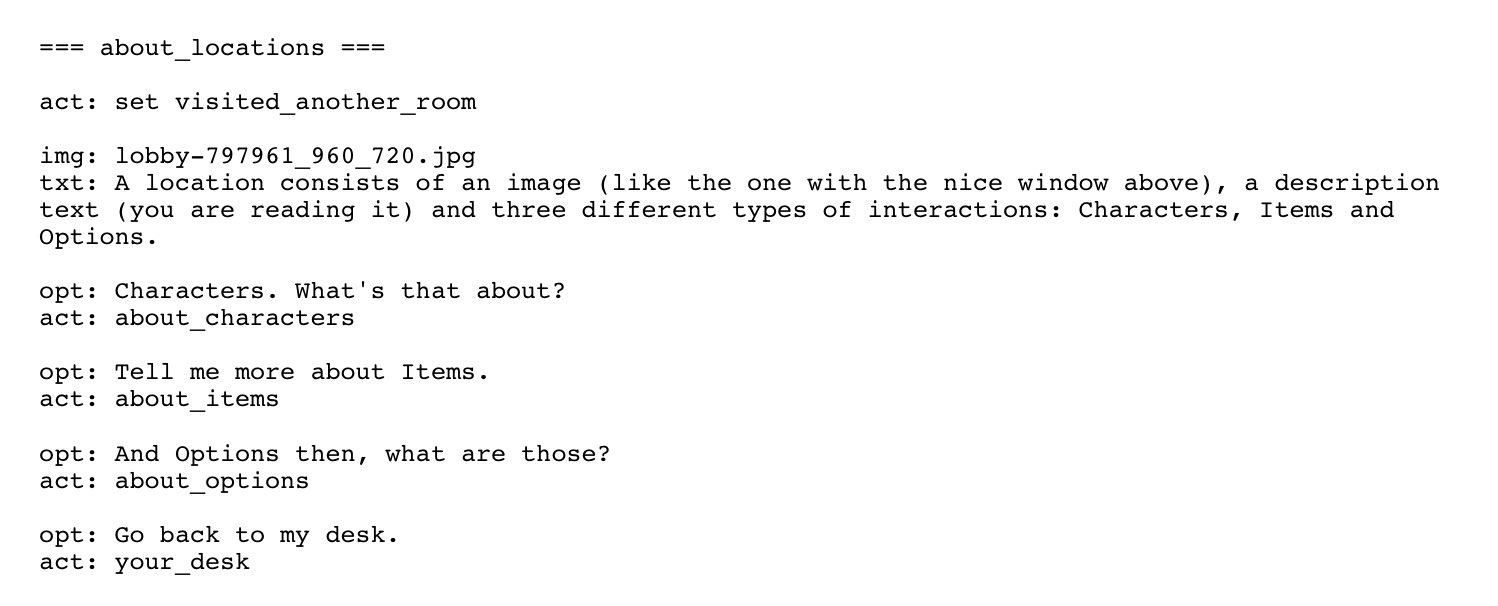
Adding options to a location is done like this. opt: declares the text to display for the option, and act: specifies where to go if that option is selected. Also, in the first line of the script, a flag (visited_another_room) is set to true. Flags can either true or false.
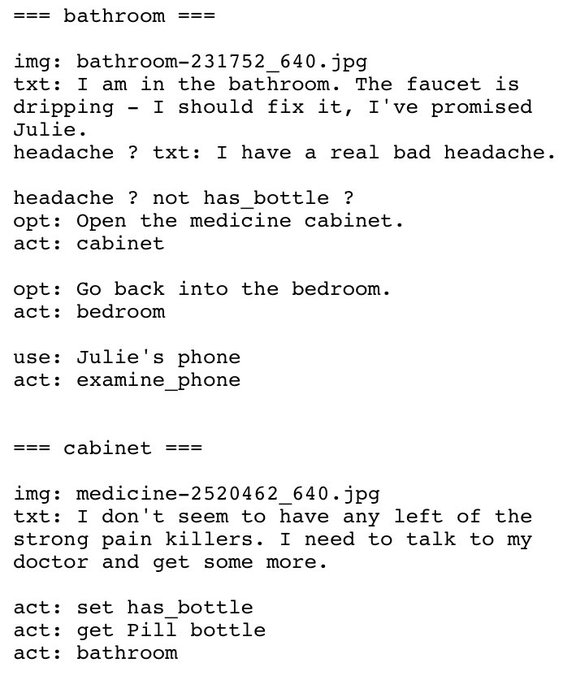
Flags can be tested like in this script, and text or images can be included or omitted based on any number of flags.
A (hopefully) complete, though brief, documentation of the scripting language is in the accompanying readme file, and also on github: https://github.com/mattiasgustavsson/yarnspin
I hope you enjoyed this write up. If you find it interesting, why not join the freshly started Yarnspin discord server, and come chat about everything related to interactive fiction, text adventures and visual novels.
Leave a comment
Log in with itch.io to leave a comment.